Showing posts with label MAKEUP. Show all posts

Monday, March 17, 2014

Step by Step: My Night Time Makeup!

This is a continuation of my "Everyday Makeup" post from last week.  Go HERE if you would like to see my makeup from the very first step :)

This is how I turn my Everyday Makeup to My Night Time makeup.  


Step 1: Highlight


I use this cheap-y eye shadow set for highlight.  You can buy makeup products just for highlight but I find that eye shadow with a bit of shimmer works great and it is usually a lot cheaper.

For the winter I tend to go with a white shimmery iridescent color and the pale gold shimmery during the summer months.

Also you should find one that has a bit of shimmer NOT large flecks of glitter. 


The basic concept of highlight is to call "attention" to certain parts of your face.  It "tricks" the eye by making those areas on your face more prominent because of the shimmer. (Important if you have flat pancake face like me lol!)

I put highlight on my cheekbones (to create the illusion of higher cheekbones), on my temples (a smaller more oval shaped face), on my forehead (it pulls attention to the center of your forehead creating the illusion of a smaller face), the center of my nose (to create the illusion of a thinner nose), right underneath the brow bone (to give you more depth in the eye area), cupids bow (to make your lips look pouty), and finally my chin (to give the illusion that the chin is pointier.)

And blend, blend, blend!


Here you can see distinctively see the highlighter on my cheekbone, blush at the front, and bronzer in the hallows of my cheeks.

Maybelline Define-a-Line in Ebony Black

Step 2: Eyeliner


I use this to line the OUTER part of my my lower lids.  I only line it about halfway because if I line the whole thing I find it actually makes my eyes look smaller.  Here my right eye is lined and my left one isn't.


Here both sides are lined and smudge the liner so it's not as harsh.

Wet & Wild Pencil in White

I use to white eyeliner to line the FRONT of my bottom lids.


Here you can see that the front of my bottom lids are lined w/ the white to help open my eyes.


Step 3: Powder Foundation

I do a quick dusting of this to "set" my liquid foundation as well as go my bronzer, blush, highlight & eyebrows to make everything look "softer" and less harsh. 

Guerlain Meteorites in Claire

Step 4: Illuminating Finishing Powder


I swirl the brush a few times and then lightly dust it all over my face.  It gives your skin that "radiant" glow and creates a sort of "soft" focus with the iridescent shimmer.


Step 5: Setting Spray

This is probably my Holy Grail out of my entire makeup arsenal.  I really don't know how I lived my entire life without this (especially in Hawaii.. humidity + my club ho girl days = scary raccoon eyes and blotchy runny foundation lol).

I spray it in a "X" formation on my face and it completely sets my foundation for the entire day.  I find that I almost never fix my foundation/eyeliner anymore.  I use to take out my blotting paper and re-powder at least 1x (sometimes 2x a day if I was running from work to HH or to my 2nd job) a day but I find that I maybe only touch up once every few months and it's really only during the hot summer months now.


And Finally...

Step 6: Falsies 

(I got lots of requests about how I do this! So here you dolls go :)!


As always falsies/lash extensions ect is very personal if you have GORGEOUS natural lashes then by all means.  However I'm definitely not blessed in that area so Falsies are my best friend! lol!

I try and re-use my false lashes 2 to 4 times.  I don't use the entire lash strip because I've found (after lots of trial and error!) that using the ENTIRE lash strip actually causes my eyes to look very "heavy".  It actually makes my eyes look smaller (and sleepy) which sort of defeats the purpose of falsies which is to have huge doll eyes of course!


I cut off roughly 1/3 of the falsies in the FRONT not from the back like most ppl do.  And the reason for that is because if you cut from the back then you're cutting off the longer flairs. The longer flairs "open" your eyes up - that coveted "almond" shape giving the illusion that your eyes are longer and wider.


I like to use black eyelash glue because when I use white/clear glue I tend to find that I almost always have to go back over with liquid eyeliner.  I put a thin layer and then I put two extra little "blobs" on both ends because those are the first places to come undone.


Here you can see my right eye has the falsies on and my left one doesn't.

I also glue my falsies SLIGHTLY about my lashline.  I find that it helps to open up my eyes more. I know everyone says to apply them directly onto your lashline but with eyeliner it can really cause your falsies to disappear and I find that by gluing them slightly higher the lashes are more apparent.


And here they're both on!


Then curl your natural and false lashes together!

(Lol excuse the mess behind me I was in the middle of cleaning out my closet for donation which resulted in the mess in the back..)


And that's it's!


If it's a special occasion or GNO I might go a little heavier on the eye shadow ect but for the most part this is pretty much my go to night routine.


And that's it from the very 1st step to the last!

I hope this was helpful and that you dolls enjoyed this!

Let me know if you have any questions and if you try any of this and how it went for you :)

Disclosure - All of these were my own products and I am not being reimbursed for this in any way shape or form. Cha Cha Cha!

Friday, March 14, 2014

Step by Step: My Everyday Makeup!

Hi!  I've gotten a few requests for how I do my makeup so here we go!

I just want to preface this by saying I'm not a beauty blogger ect. (and there are some SERIOUSLY amazing ones out there that I'm in awe of!!)

I've never taken makeup classes or anything it's just sort of what I've learned from trial and error over the years.  So I just wanted to share with you dolls how I'm doing my makeup right now :)

Bath & Body Works anti-bac, Clear Eyes Maximum Redness Relief, SK-ii Essential Power Cream, Smashbox Photo Finish Light, Carmex Lip Balm

Ok let's get started!

So for me "prep" is REALLY important.  Especially now that I'm 30 (eeps!) I definitely feel like my age is catching up to my skin ect more these days then ever before.

Step 1. Hand Sanitize  (I'm a germaphobe.)  

Step 2. Eye Drops

Step 3. Moisturize

Step 4. Prime

Step 5. Lip Balm (doing it at the being moisturizes your lips so that at the end your lipstick glides on a lot smoother.)


A dime sized amount of Primer and then I dot it basically in my T-Zone (in other words wherever I have giant pores lol!)

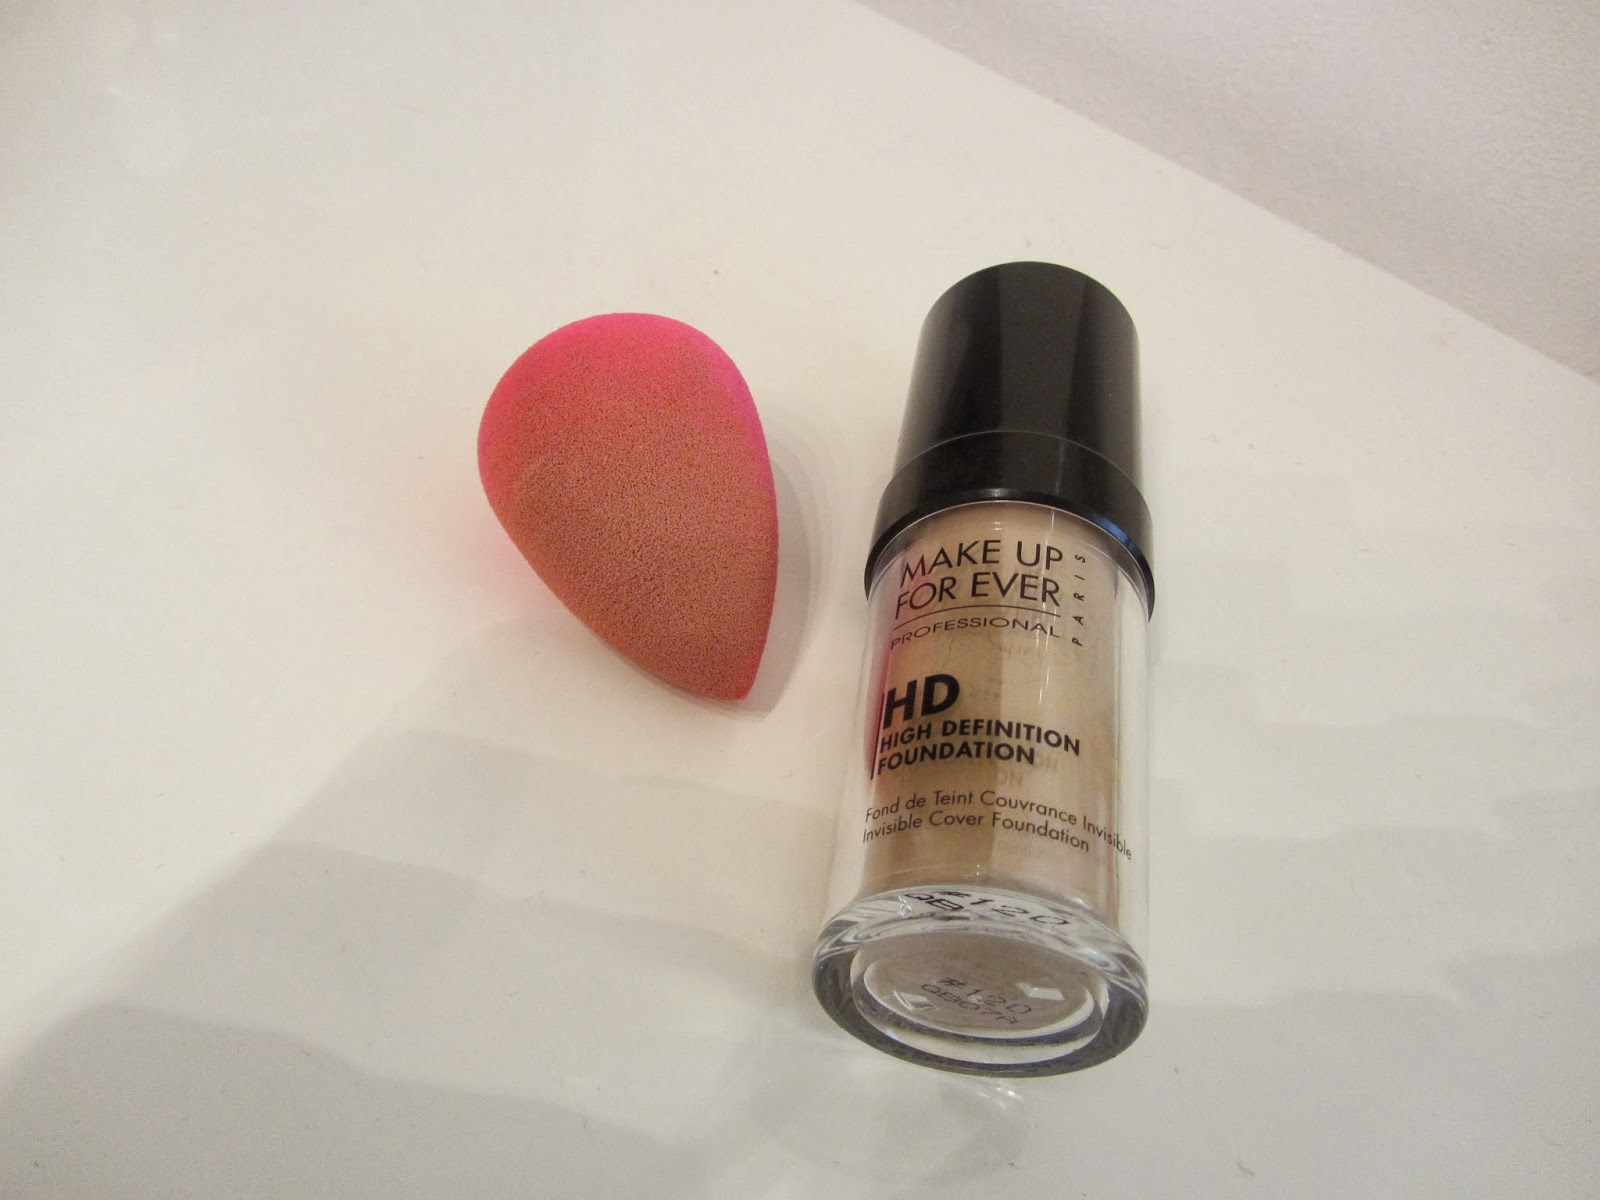
MUFU HD Foundation & BeautyBlender

Step 6: Foundation.  

The BeautyBlender has COMPLETELY transformed my life.  I actually resisted getting it for like I think a good year even though I kept seeing/hearing about it on blogs/vlogs/magazines.. because I'm an old fart and and don't like change.  But a girlfriend actually gave it to me as a birthday gift and let me just tell you it's AMAZING!  I use to always use a foundation brush and would get these awful streaks but no more!

Also since you're actually suppose to use it wet I always take it to the bathroom and squeeze some baby soap in it and give it a few good squeezes before I put on my foundation so it's basically "clean" every time I use it.  Definitely cleaning it more then when I used foundation brushes lol.


Also because you use it wet I found that one good pump of foundation is all I need whereas before I would probably use at least 2 pumps if not more.  Which usually leads to really cakey looking skin. Bleh!


I basically dot it in the same places that I dotted my primer. 


And from there on out I blend outwards and dab dab dab! 

Yves Saint Laurent Touche Eclat

Step 7: "Concealer" 

The reason for the quotation marks is because the YSL Touche Eclat I think is really more of a "brightener" and less of a concealer.  It reflects light so that it basically "tricks" the eye from seeing the dark shadows ect. Versus a real concealer that is actually truly concealing.


I use it it in area's wherever there are dark shadows - if you need help finding them I always tilt my head slightly forward and look directly in the mirror and the shadows on your face will become very apparent.


And then just use the BeautyBlender again to blend it all into your foundation.  Also make sure when you're doing concealer to dab do not rub it in.

Too Faced in Chocolate Soleil

Step 8: Bronzer

I like to use a non sparkly bronzer for face contouring.

(And my face needs it as I basically have a wide flat pancake face lol.) 


For the sake of showing you guys how I do my bronzer/blush I was a little more heavy handed then usual. But don't worry all of this just gets blended out later on :)

I use the "E-3" formation.  Start at the temples swoop down to the hallows of your cheek and then on to your jawline.

Nars Deep Throat

Step 9: Blush


For reference the right side has blush on and the left side doesn't.  I apply it in a sweeping motion on my apples and into where I bronze.


Here you can see quite distinctively where my blush and bronzer are and then I blend the two of them together.

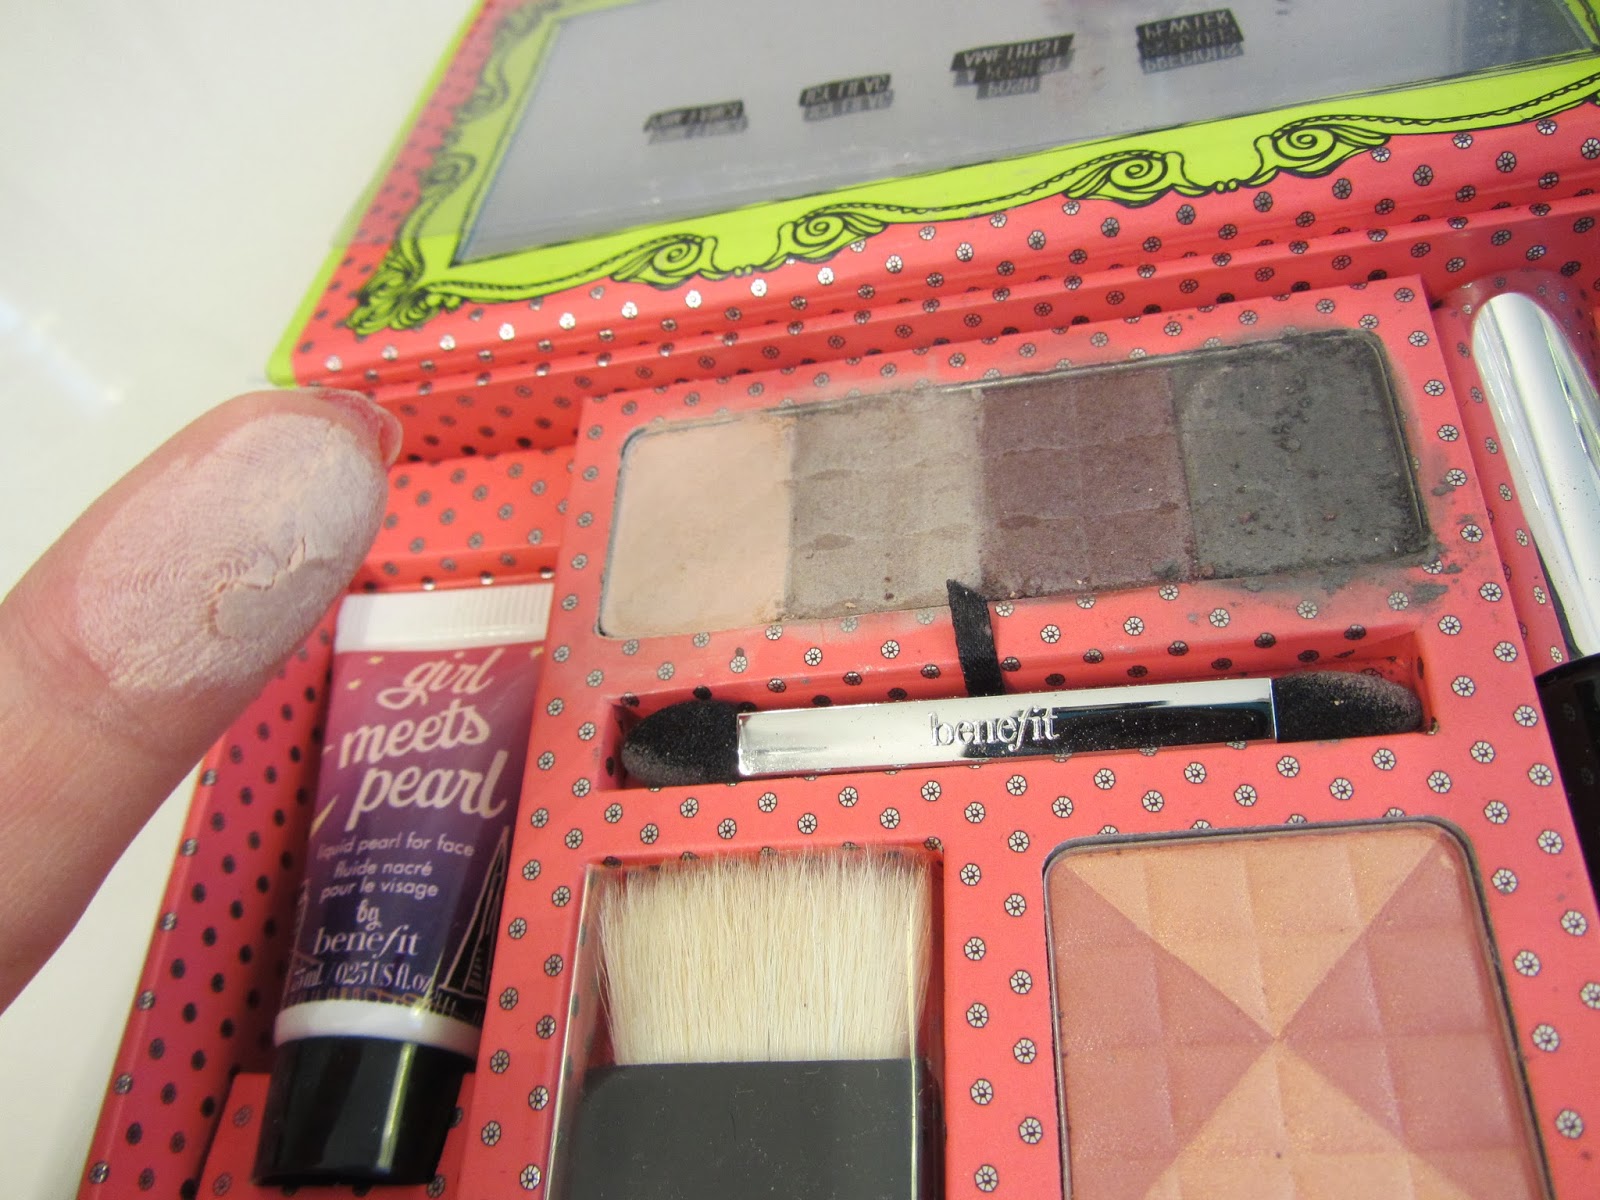
Benefit Glam Girl Palette

Step 10: Eyeshadow

A nude neutral shimmery color and sweep it all over my eyelids.


And then a darker purple/grey/taupe color underneath my eyelid line.


For reference the right hand eye has the shimmer nude and purple shadows on already.


Step 11: Eyeliner


I start by drawling a line in the middle my eyelid and then extend it further past my eyes.  (Btw I don't waterline/tightline because my eyes are small and I think it make my eyes look even smaller)


After that I draw a tiny line on the corner of my outer eye that connects with the end of the first line creating a sort of triangle.


And then I fill it in for a cat eye.


Maybelline eyebrow pencil in Med Brown

Step 12: Eyebrows

As for my eyebrows.. let's just say they are a constant work in progress! 

I wouldn't say I necessarily LOVE LOVE my brows now but I think I'm getting the hang of it more and more these days.


And as proof I dug up some photos of my early 20's

Let's call this the "Best of Brows" 

(OBVIOUSLY sarcastic lol)


YIKES!!!  

So as you can see I didn't just have ONE type of bad brows.. I had several bahahaha... not to mention bad eye shadow.. bad eyeliner.. bad foundation.. ect.

Ok and with that little detour down memory lane this concludes how I do my everyday makeup.

Stay tune for Part 2 - Taking my Everyday makeup to Night time makeup!

Disclosure - All of these are my own products (except for the Benefit palette which was gifted to me by American Express) and I am not being reimbursed for this in any way shape or form. Cha Cha Cha!

Wednesday, July 17, 2013

THE HUBS, FOOD & BVLGARI


Surprise package from the Hubs from Neiman's!

WOOT!


Shy by Sydney Evan pendant that says "Kiss" and has a tiny itty bitty diamond too for that little extra hint of sparkle on your decolletage! 


So cute I heart it!!

The pendant is REALLY teeny tiny it's just the tiniest hint of gold on my decolletage.. and because it's so tiny the word "Kiss" looks like "Lisa" when I wear it so I doubly love it muhahaha..  I love it so much I've been wearing it everyday since I got it and haven't taken it off hehehe :p


He also found my MOST favorite Japanese cookies EVERRRRRR!!  

Yoku Moku!!!!

Yummiest lightest butter cookies EVER!!  

I use to buy then all the time when I lived in Hawaii at Shirokiya but couldn't find them after I moved back to the mainland.  Well apparently they sell them at Neiman Marcus who knew?!

It comes in the decorative pink heart tin box that you see above.. which is awesome because I can use it afterwards to store costume jewelry ect.  This box might be limited edition because I've never seen it before when I use to buy them in Hawaii they came in a nondescript blue or red tin container.


Thanks so much booboo :) 

<3 u!! 

And yes I'm totally munching on these while I'm doing this blog post tehehehe. 

Dragon roll - California roll w/ eel


Tonkatsu Ramen

Shrimp & Vegetable Tempura

The shrimp tempura was sooo good.  And they gave so much too!! 


Isn't my bestie so pretty? :p 


I don't know why I haven't blogged about this earlier.  But this is my HOLY GRAIL product. Yes over  EVERYTHING else in my makeup arsenal.  I cannot live without this stuff.

This is my 3rd time placing an order so you can see that I cannot live without this product.  I use it EVERYDAY.  When I do occasionally fail and forget to spray it or something I find that my makeup is runny  and I look "sweaty".  It basically cools the temperature on your face to keep you from sweating and stuff.  Idk how it works or why it does it.. but I LOVE IT!  I have combination to oily skin and this thing is a life saver.  Before I use to find that I had to blot 4 or 5 times a day and reapply powder at least once a day if not more.  But I find that I never do that now unless I'm out for more than 8 hrs.

You can purchase it from a plethora of places online and the 4 oz. is $29 & the 8 oz. is $39.. but if you order "The Kit" on the Skindinavia website you get two 4 oz. bottles for $45 and two 8 oz. bottles for $55 (if you bought 2 bottles of the 4 oz piece meal it would basically be $60 bucks and 8 oz. piece meal $80 bucks! SUCH A STEAL!).. 1 bottle is the Original formula and 1 bottle is the "No More Shine" which is awesome... I prefer using the "No more shine" during the summer months and switch to using the Original formula during the winter months... and then you also get the tiny trial sized you see in the front.

Urban Decay has the same product which is apparently is also made by Skindinavia however I tried a bottle of it and I much prefer the Skindinavia product over Urban Decay.. which is slightly befuddling since I'm assuming it would be the same formula.  But anyways I'm back to using the Skindinavia version :)


It's so nice being back home and waking up to Pork & Thousand year old egg congee courtesy of my mommy!!

Nom Nom Nom!  SOO GOOD!


Out for a colorful walk with my fur daughter! 

Tortilla chips & salsa


Hubby flew from Germany to visit me for three whole days! 

WOOHOO!!

Shrimp fajita & Beef taco w/ Chicken Enchilada


DUCK CROSSING!

The whole time I was walking up to them trying to get as close as possible the Hubs was yelling at me to not get too close because he was afraid they were going to poke my eyes out bahahahaha!


SOOOO CUTE!! 

I think these were the SAME ducklings that I had blogged about HERE.  I was sort of astonished as to how big they had gotten in such a short amount of time!


I swear Target has the BEST selection of Hello Kitty appliances. 

I.WANT.EVERYTHING.

HAHAHAHAHAHAHA.


Out to dinner w/ The Hubs :p

Do you see the tiny "Kiss" pendant?? 

heheheheheh


Ren's Ramen!

Fried Rice, Diet Coke & Ramum

Omgosh their fried rice was sooo nommy!!  

And seriously is there anything better than a super cold Ramune? 

I love Ramune!!! 

It's so refreshing and surprisingly low cal considering how yummy it is. 

<3 <3 <3!

Shoyu Ramen

So happy to see his face!


Tan Tan Ramen

OMGGGGGGGGGGGGGGGGGGGGGGGG

My ramen was SOOOOOOOOOO effin' good.

OMG. 

It's a super delicious and fatty tonkatsu broth mixed with miso and made spicy.  

I.LOVE.SPICY.RAMEN.


Ramen fail.  

Hahahahaha. 

It was so good but their portions were so big!

But I promise you it made a tasty 2nd meal the next day hahahahahaha.


Late night Micky D's ice cream pit stop :)

Just like when we were dating hehehe!


He's obviously so excited 

-____-


Found these ADORABLE Giuseppi Zanotti crystal flats at Loehmann's on sale.. original price $750 marked down to $499.99.  YIKES!

Had to pass on them but they were so pretty!


HAHAHAHAHAHAHA.


My fur baby!


Cosi lunch! 

So good omgosh I love their flat bread sammies.  

They have a new drink it's the Apple-Tea-Ni it tastes JUST like Japanese Hi-Chew apple candies but in drink form.  And the drink is 10 calories. WHAT THE EFFFFF!  Seriously as I was drinking it I couldn't believe it.  IT IS SO GOOD.


Some shoe finds at Nordstrom Rack!  

Loving my new studded orange sandals.. and cannot get over how FREAKIN' comfortable Minnatoka Moccasins are OMG.

#wherehavethesebeenmywholelife 


Heart this girl she made me HOMEMADE strawberry jam from the fresh strawberries she picked!!! 

BTW the jam was so good.. literally made me run out and buy scones hahahahahaha!

Crab Artichoke Dip


Apparently all of us got the burger memo.

Kobe burger w/ bacon, cheddar & fried egg & side of fresh cut potato chips

OMGGG this burger was SOOO NOMS.  

So juicy and tender who knew Gordon Biersch's burgers were that yummy!

Btw's I made the mistake of ordering the potato chips.  Don't be stupid like me.  The garlic fries are hands down the winner.  I know I know!!  I was stupid.. I've been ordering their garlic fries for years and decided that I wanted to try something different this time. 

Well don't. Just don't. 

hahahahhahahahahaha.


My dad gave me a vintage Bvlgari watch as an early 30th b-day present!

LOVE!! 

Thanks so much dad!!

#OBSESSED